There’s a time for pretty and there’s a time for agile. Thanks to these tips and tricks, you can streamline your web viewer for heavy lifting or turn on all the bells and whistles for a smoking hot presentation.
If you start to see your models in BIM Track’s web viewer getting a little sluggish for your day-to-day coordination, here are a few ways to get back up to your usual speed:
Categories
Once we’ve turned on the models we need to see from the Project Tree, we have the ability to turn off unneeded and unwanted categories from the Categories tab.
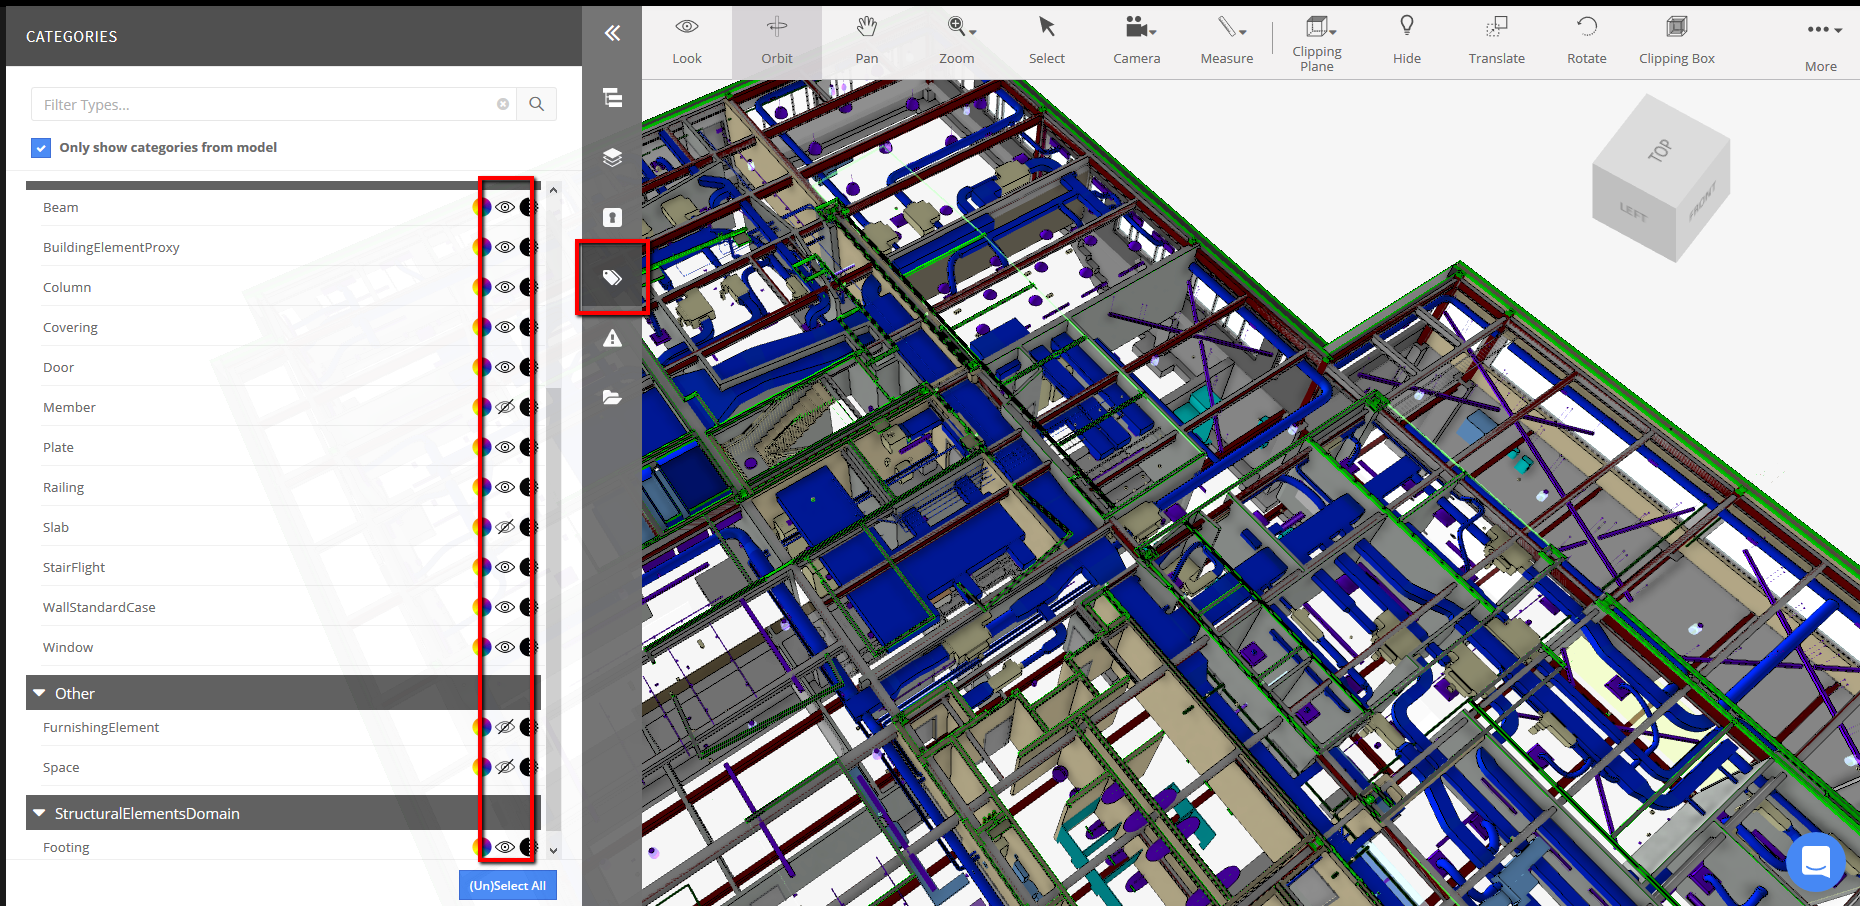
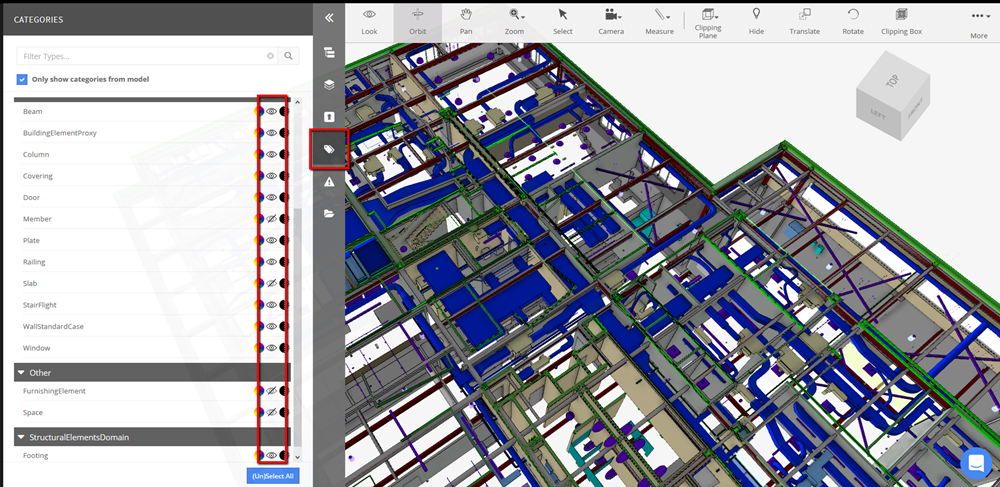
This is going to free up some serious space in the model and allow us to move around much more quickly. Depending on what you’re looking for and coordinating against, it’s difficult to recommend categories to be hidden, but things like potted plants, desks, chairs, furniture, are usually not necessary. They can be found in the Other subcategory and are controlled by the FurnishingElements.

Once those categories are switched off, it’s highly recommended to save your view in the Views command so you don’t need to keep switching off any pesky categories. Check out this video on creating saved views.
Performance Tab
The performance tab is the most powerful tool at our disposal when it comes to our model performance in the web viewer. The options here each have their own unique effect on the models.
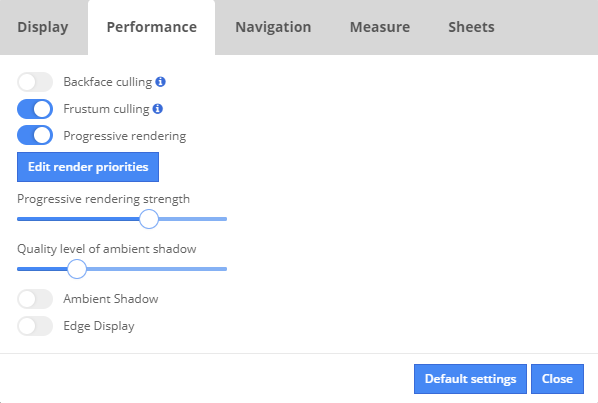
Let’s dive into what each Performance setting controls:
Backface Culling
Determines whether a polygon of a graphical object is visible. It is a step in the graphical pipeline that tests whether the points in the polygon appear in clockwise or counter-clockwise order when projected onto the screen. Enabling this option will hide the elements that are faced away from the camera, therefore allowing faster movement in the web viewer.
Frustum culling
This is the process of removing objects that lie completely outside the viewing frustum from the rendering process. Enabling this option greatly improves the 3D viewer performance as all the elements outside of the view scope won't be loaded in the memory. This setting is very handy for large projects that contain many IFC files. On a smaller project, this setting is not a necessity as the engine will manage to display all the elements without affecting the performance.
Progressive rendering
This is a rendering mode in which the program gradually updates elements of the entire model; refining it from the largest elements to the smallest rather than focusing on small elements at the beginning of the rendering process. The goal of progressive rendering is to always be able to see the process of refining the rendered model as a whole. Pretty much like a painter sees their work evolve from a sketch by looking at the whole canvas after he adds more and more details. This setting is very handy for large projects that contain many IFC files. On smaller projects, this setting is not a necessity as the engine will display all of the elements at once.
Edit render Priorities
In this menu, you can define which elements should be displayed first. This option is linked to the progressive rendering. In order to get the best performance, we recommend prioritizing the elements linked to your work scope. So, if you're reviewing the mechanical parts of the project, it is best to prioritize mechanical categories. That way, the display of mechanical elements will be prioritized by the rendering engine.
Progressive rendering strength
Decide the level of your progressive rendering. The Higher the bar, the more elements are hidden.
Ambient Shadow and Edge Display
The web viewer is the ideal platform for recording issues, monitoring progress of models, and communicating directly on issues with your contributors. It’s also used as a presentation platform. Clients can be wowed with a creatively placed clipping plane; with the ambient shadow and edge display enabled, they can really get a feel for their investment.
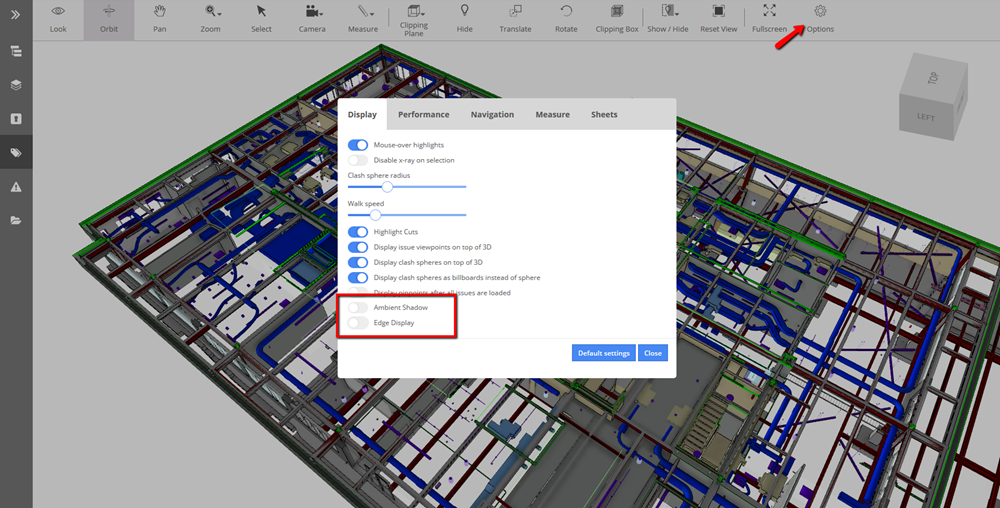
But when coordinating multiple models, that ambient shadow can sometimes be more of a distraction than a help. In the Display tab, simply switch that Ambient Shadow to the off position. Not only will this lighten areas of the project, but its additional elements are not being rendered, therefore speeding up the loading time. As for the Edge Display, with it enabled we are clearly outlining all of the objects in the model. It gives us a clear definition of what we’re seeing. I’d recommend playing with that option to see how your model reacts to it turned on versus turned off.

Ambient Shadows and Edge Display On vs Off
Quality level of Ambient Shadows
If you absolutely want to have ambient shadows on at all times you can reduce the quality level by sliding the slide bar to the left. If you are using the web viewer for presentation purposes slide that bar all the way up to enjoy high-quality shadows.
We designed these features so that you can use BIM Track for both heavy coordination and also for detailed presentations. We hope you get comfortable with these different settings to tweak them according to your own needs. If you ever have any questions, please do not hesitate to contact myself or the team in the in-app chat on BIM Track’ web platform or our website.

