
We’d like to share our best practices so that your BIM Track issues are clearly displayed in Revit. In this article, we will explore the different Revit views and the helpfulness of Revit view templates to see critical issues that could be hidden by certain elements. You can follow with the step-by-step screenshots below or with this video.
Orthographic or Perspective
When we click BIM Track’s view in model button in the Revit interface, we can be taken to a variety of view states, including plans, sections, elevations, and, of course, a 3D environment.
Let’s talk about those Revit 3D environments. We have a perspective camera, and an endless orthographic environment. Both can display BIM Track issues, but each has an ideal use.
The perspective camera is used when we need to traverse inside a building or project. Think of this view state like a camera on a tripod. Issues are presented in more of a static environment. We’ll be able to see issues above ceilings, below roof decks, and penetrations through walls. We look through our own eyes in a perspective view state. It’s not really the ideal view state for a Revit modeler; you might find yourself opening issues created in other platform’s in perspective, so skip ahead to using Revit’s section boxes to get into a workable view.
The orthographic environment is the Revit modeler’s ideal workspace. Imagine being able to float above your building, rotating it in front of you. Using a section box, you can cut away complete levels, the entire facade, or narrow down an entire project to the most precise location of two elements slightly clashing with one another. The orthographic view state is going to facilitate the process of actually making the needed modifications in a project.
With the differences between both 3D view states laid out it’s important to understand how BIM Track interacts with both of them. We want to look at our issues with ease and reduce the amount of time that a modeler spends locating the elements in question.
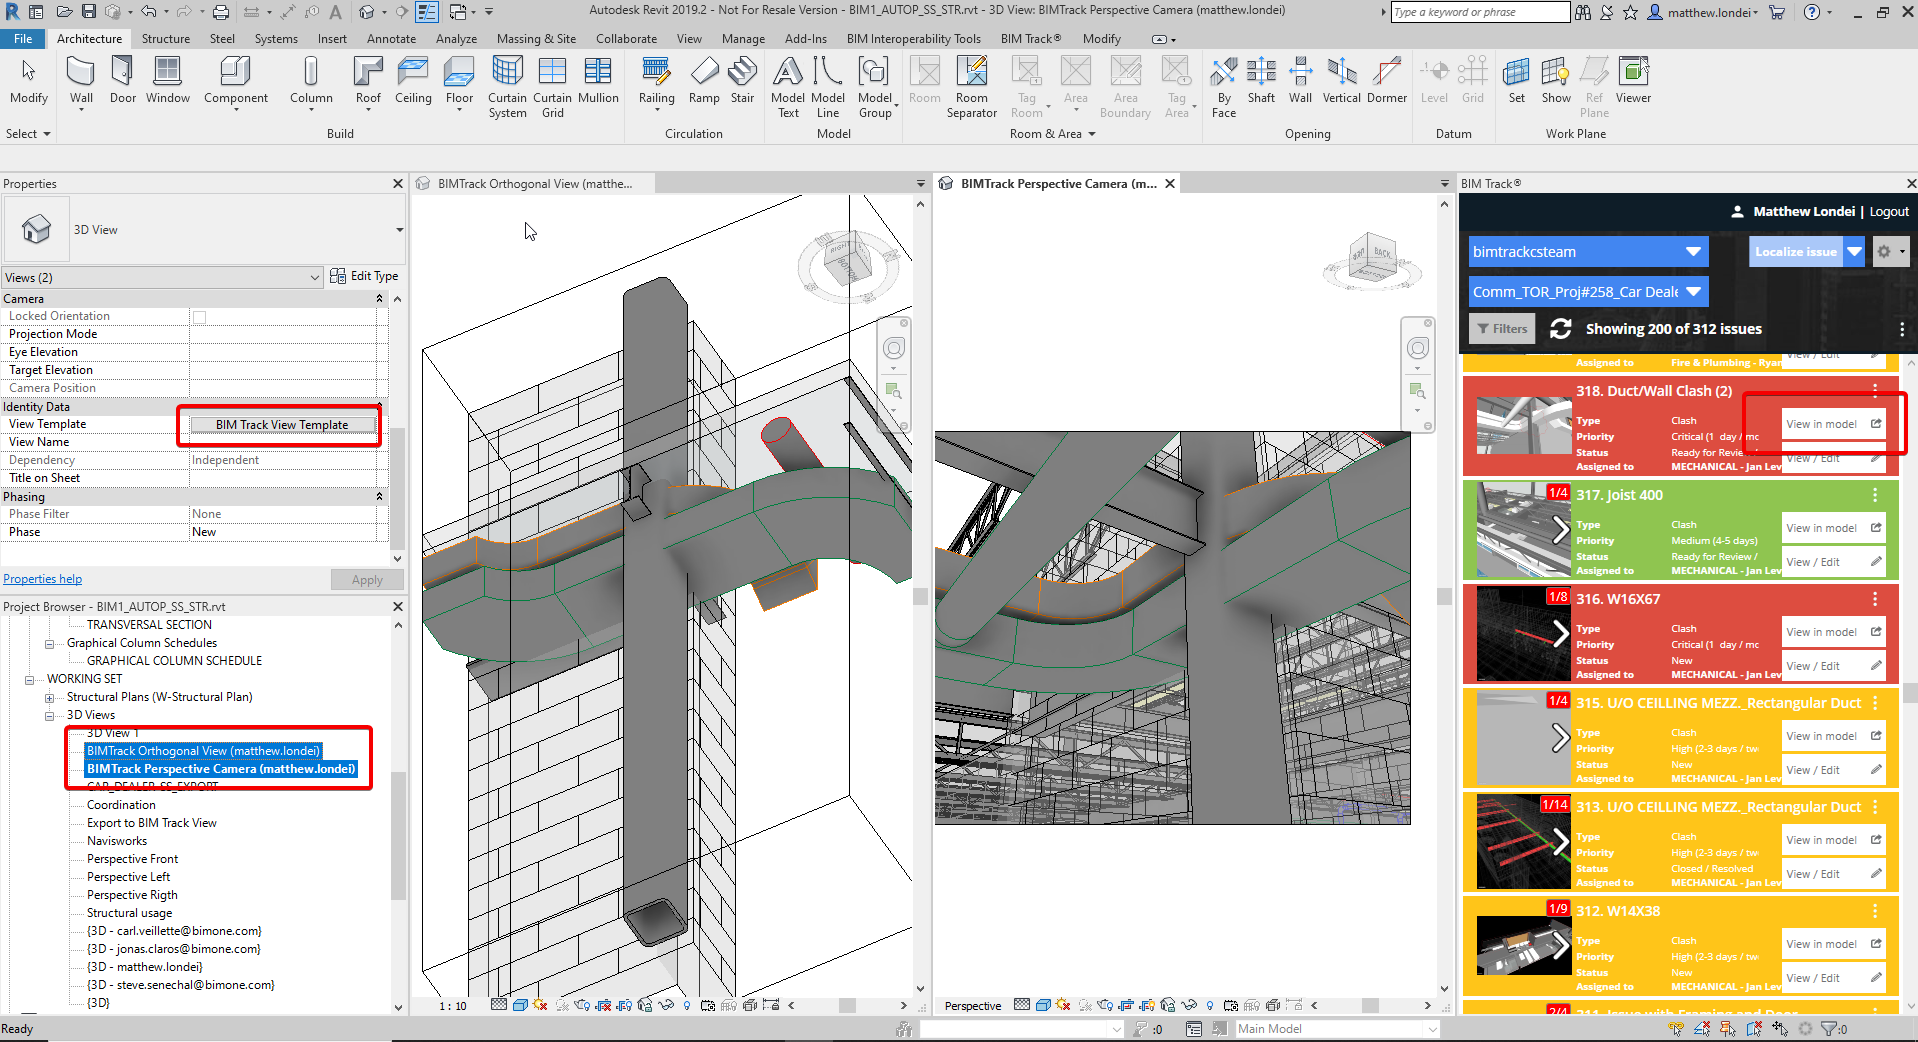
Figure 1.0 Some of the different possible view types in Revit for BIM Track issues.
Using Revit’s view templates
When looking at a BIM Track issue, we sometimes don’t realize we’re looking at a Revit view that was created by BIM Track called BIMTrack Perspective Camera or BIMTrack Orthogonal View. We sometimes overlook Revit’s ability to apply a view template to these types of views. The view template is a powerful tool that allows us to control things such as category visibility, color overrides, detail level, visual style, and arguably most important: transparency levels.
Here are some common categories we suggest applying transparency to:
- Walls
- Floors
- Ramps
- Stairs
- Ceilings
- Roofs
Why are we applying transparency to objects? Well it’s going to allow us to see right through those elements and clearly identify penetrations, clashes, and perhaps surrounding issues that may have previously gone unnoticed.
Changing an issue view from perspective to orthographic
Now you may be asking yourself “How did I end up in this perspective view?” or saying to yourself “It sure is tough working in perspective views in Revit” and we completely agree. So to answer your first question, you’ve opened a perspective view in Revit because that was the view state the user was in when the issue was created. Good news. You can make a quick change to the issue all while staying in Revit to fix your issue. Select the element(s) in question and click Revit’s Selection Box command.
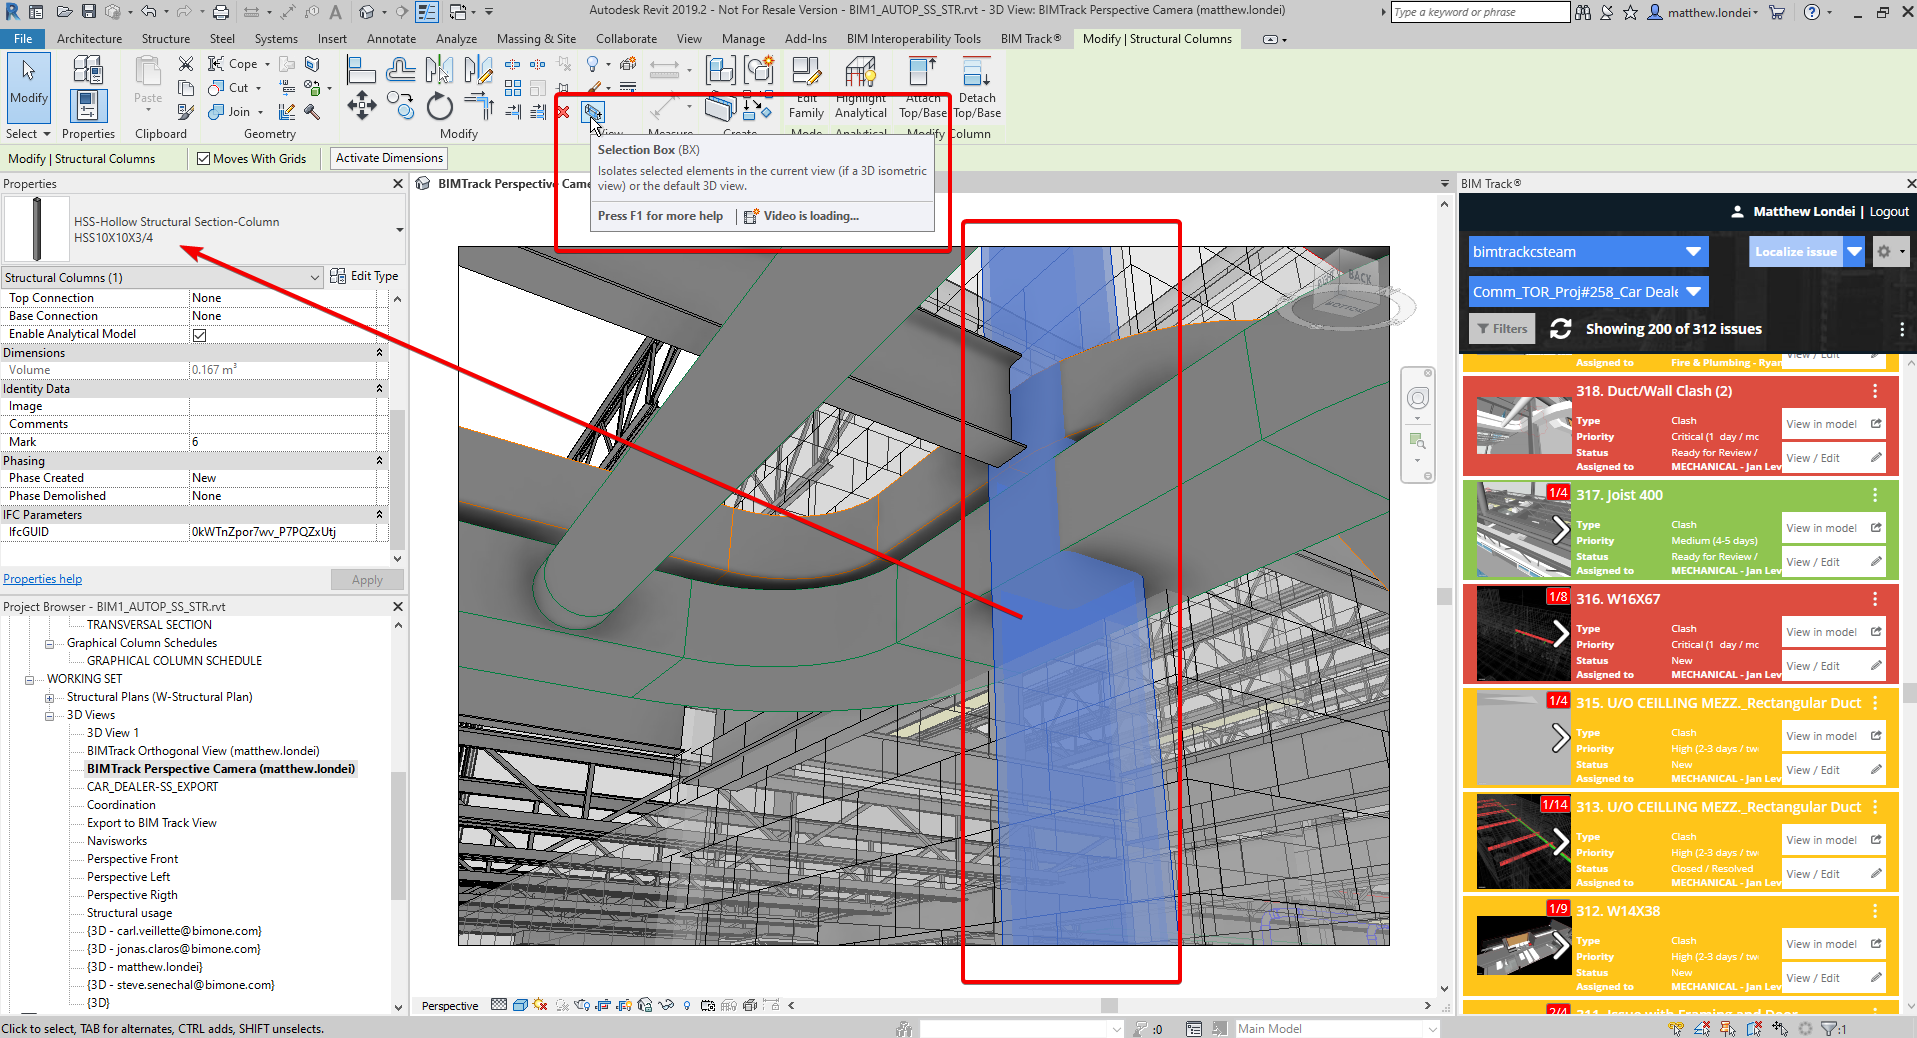
Figure 2.0 Using Revit’s Selection Box command to see the issue in an orthographic view state.
Revit will automatically open the orthographic view, and place a section box around the extents of your selected element(s). We now have the ability to orbit freely, resize our section box, or simply examine our issue in question.
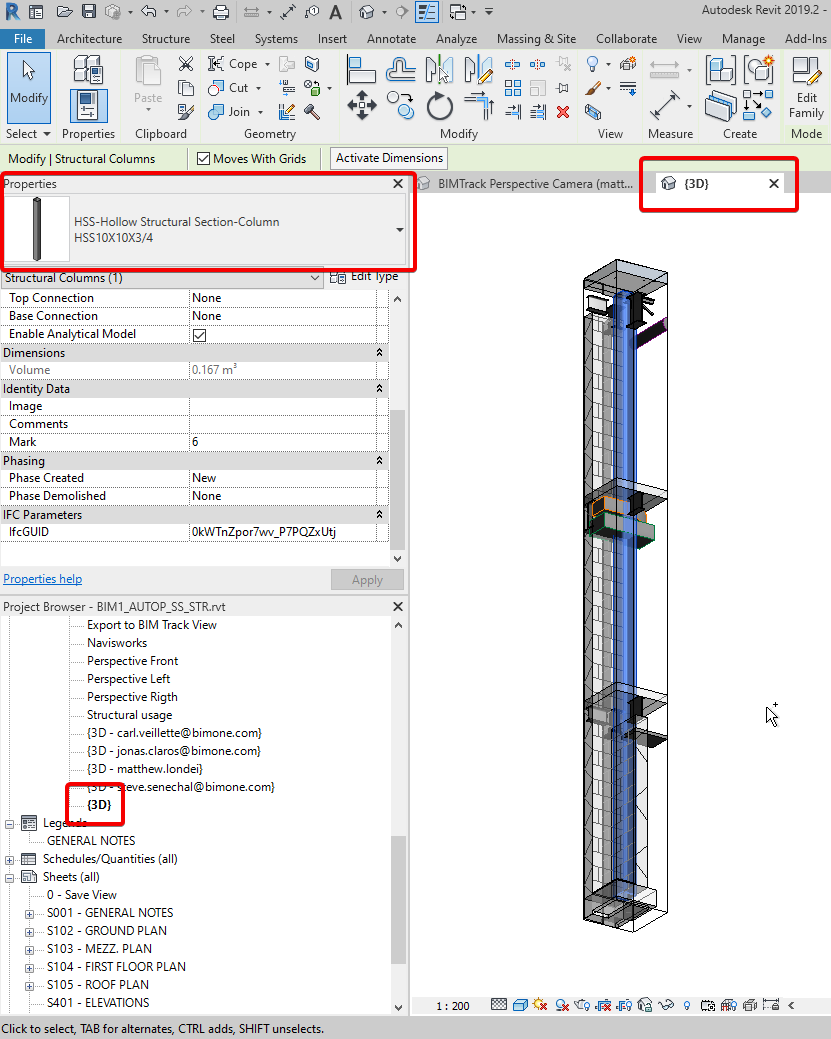
Figure 3.0 Section box placed around our issue-related elements for easier examination.
With our section box resized to display just the elements we’re interested in, we can add this view to the existing BIM Track issue by simply clicking the three dots at the end of the issue name and selecting Add from current view.
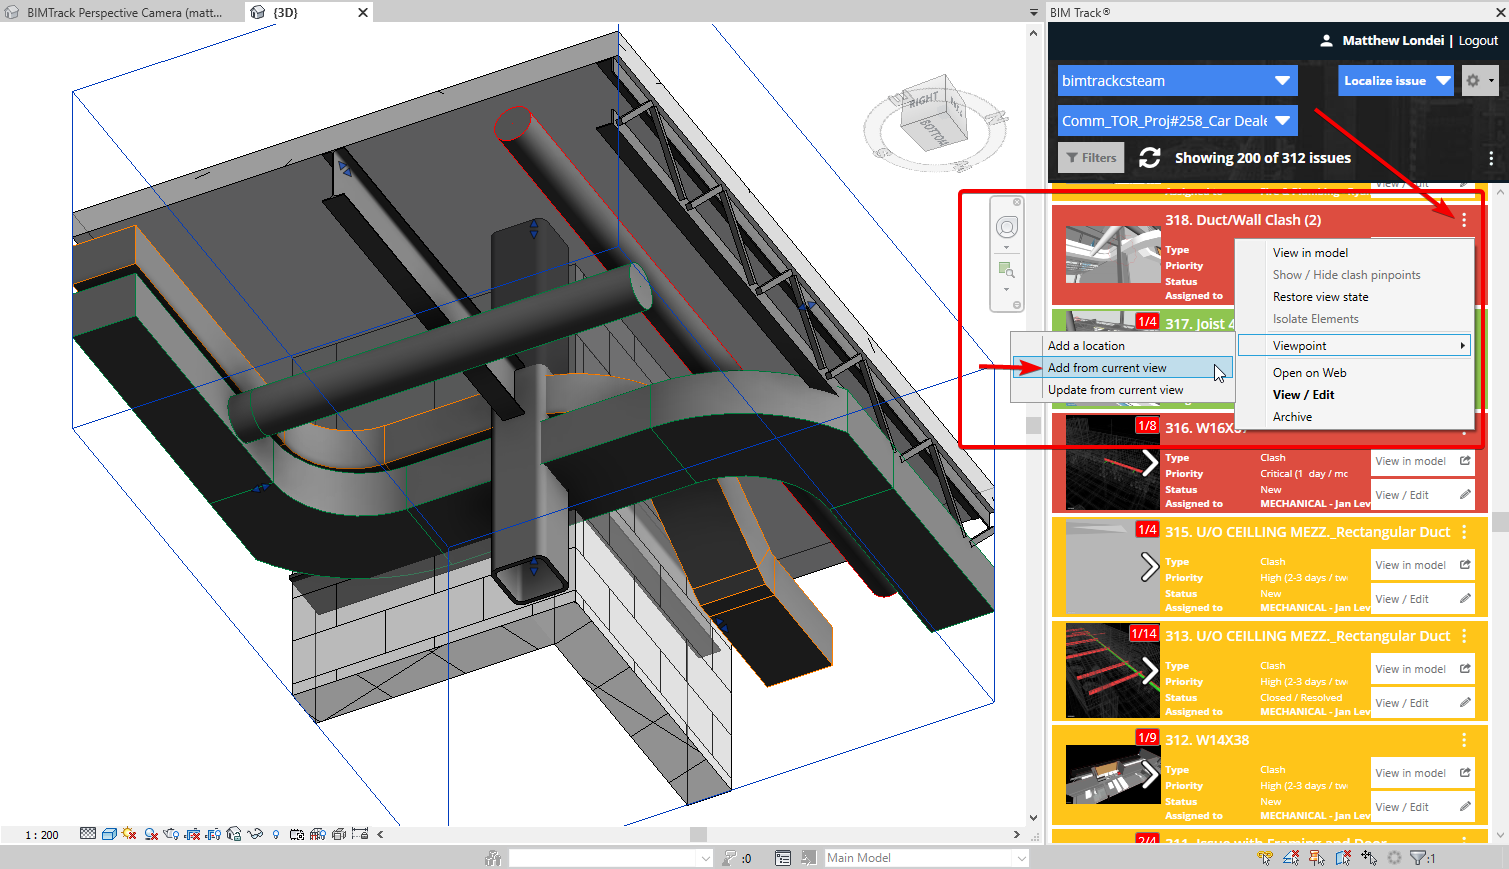
Figure 4.0 Adding Revit’s orthographic view to a BIM Track issue.
This orthographic view is now part of our BIM Track issue. We can easily switch back and forth from one preview image to the other.
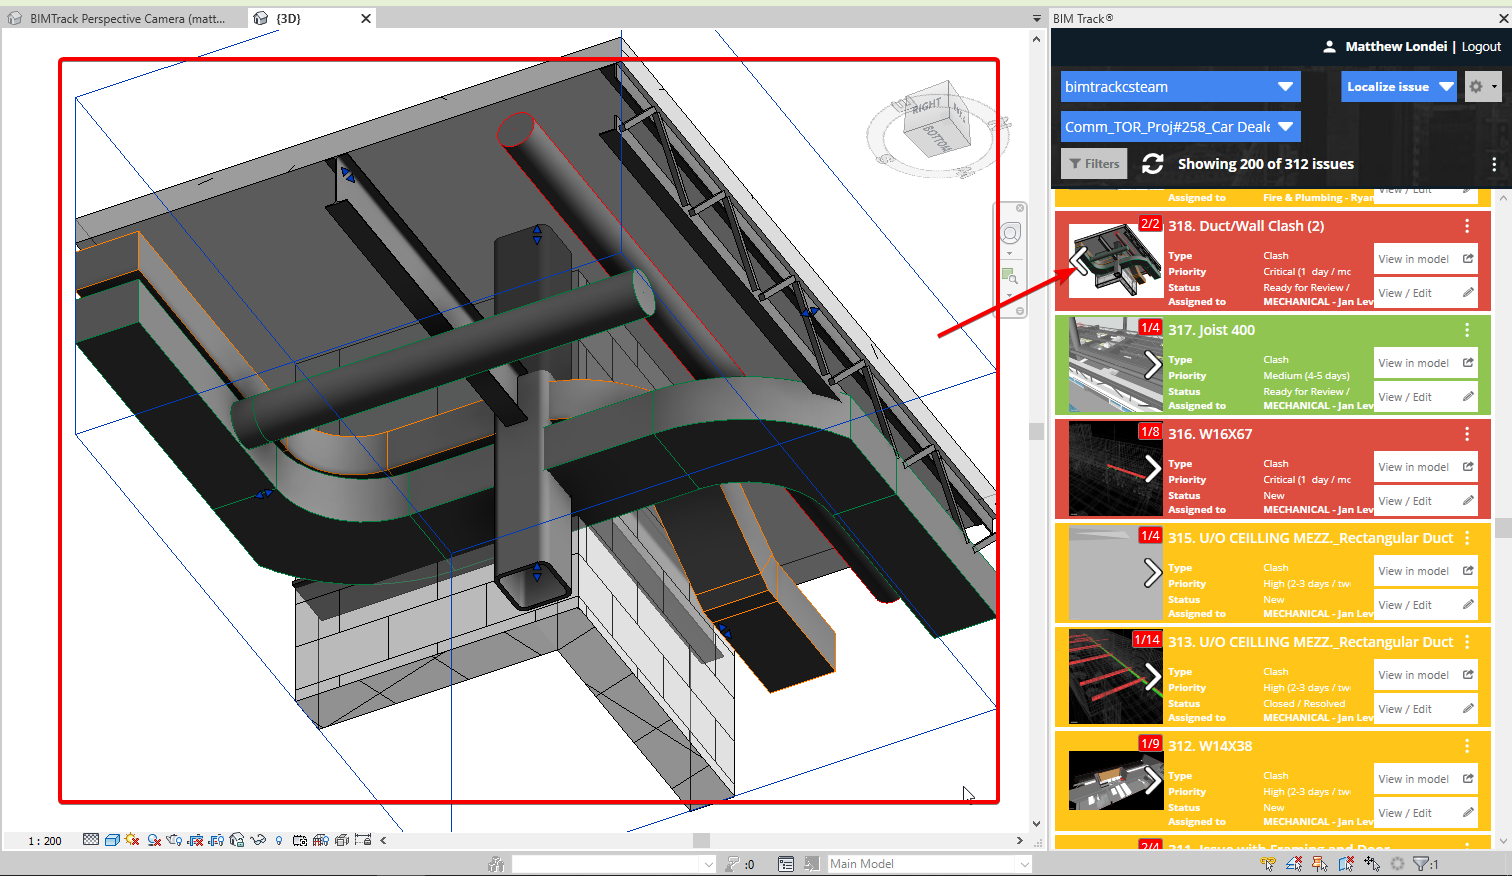
Figure 5.0 Navigating between different views of an issue in BIM Track.
We can take it a step further as well and make this new orthographic view our default image and view state so we don’t have to select between the two. Click the View / Edit button, navigate with the white arrow to your recently added view, and click the Set as default viewpoint button. A green check mark will appear in the top left corner indicating the change has been made and click the Publish button.
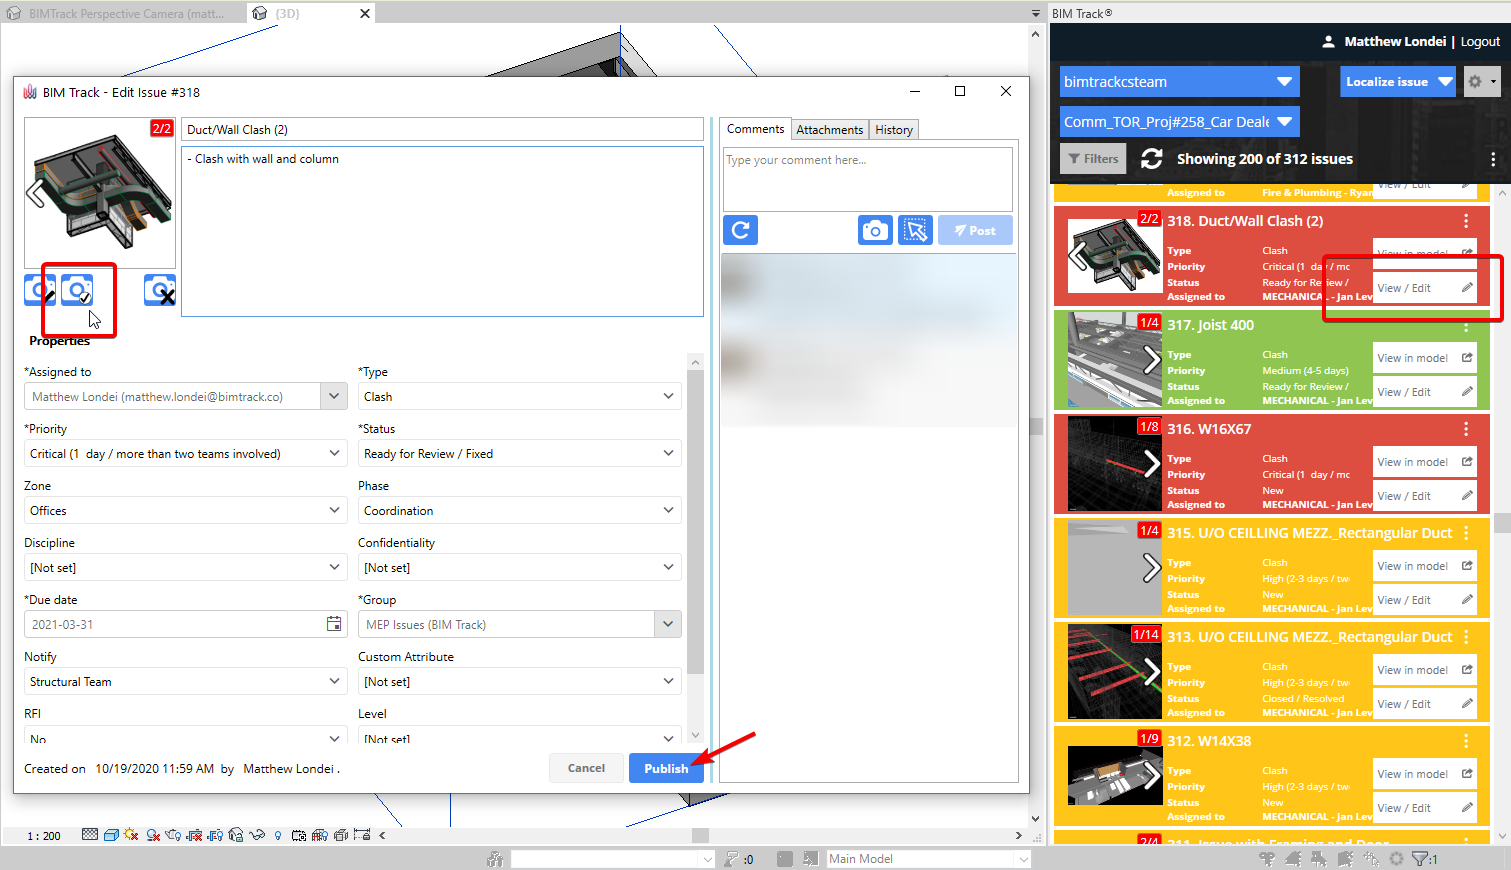
Figure 6.0 Changing the default view of an issue in BIM Track.
This issue will now use this new view as its’ default preview picture. The next time you click the View in Model button, you’ll be taken directly to the BIMTrack Orthogonal View and your custom view template will automatically be applied.
So a few things to remember when looking at your issues in Revit:
- You’re looking at views created by BIM Track when you click the View in Model button.
- It’s recommended to create view templates for those views. You can have individual templates, or use a different template for each.
- Don’t forget to make your links and worksets visible in the view template.
- Switching from a perspective view to orthographic is as easy as selecting an element in question and throwing a section box around it right from that camera view.
- Make the preview image that is most commonly used your default image to save time scrolling through previews.
If you have any other questions, please do not hesitate to reach out to our team on the live chat of either BIM Track’s web viewer or website.